Introduction
Installation
Mac
Open the dmg-File you have downloaded and double-click on the containing pkg-File. Select "continue" on the welcome screen. If you see the "Select the Destination" screen, you can click "continue" as well. Then, select "Install" and enter your admin password. The actual setup software will start afterwards.
Please click on the "I agree" button if you agree to the "License and Legal Information".
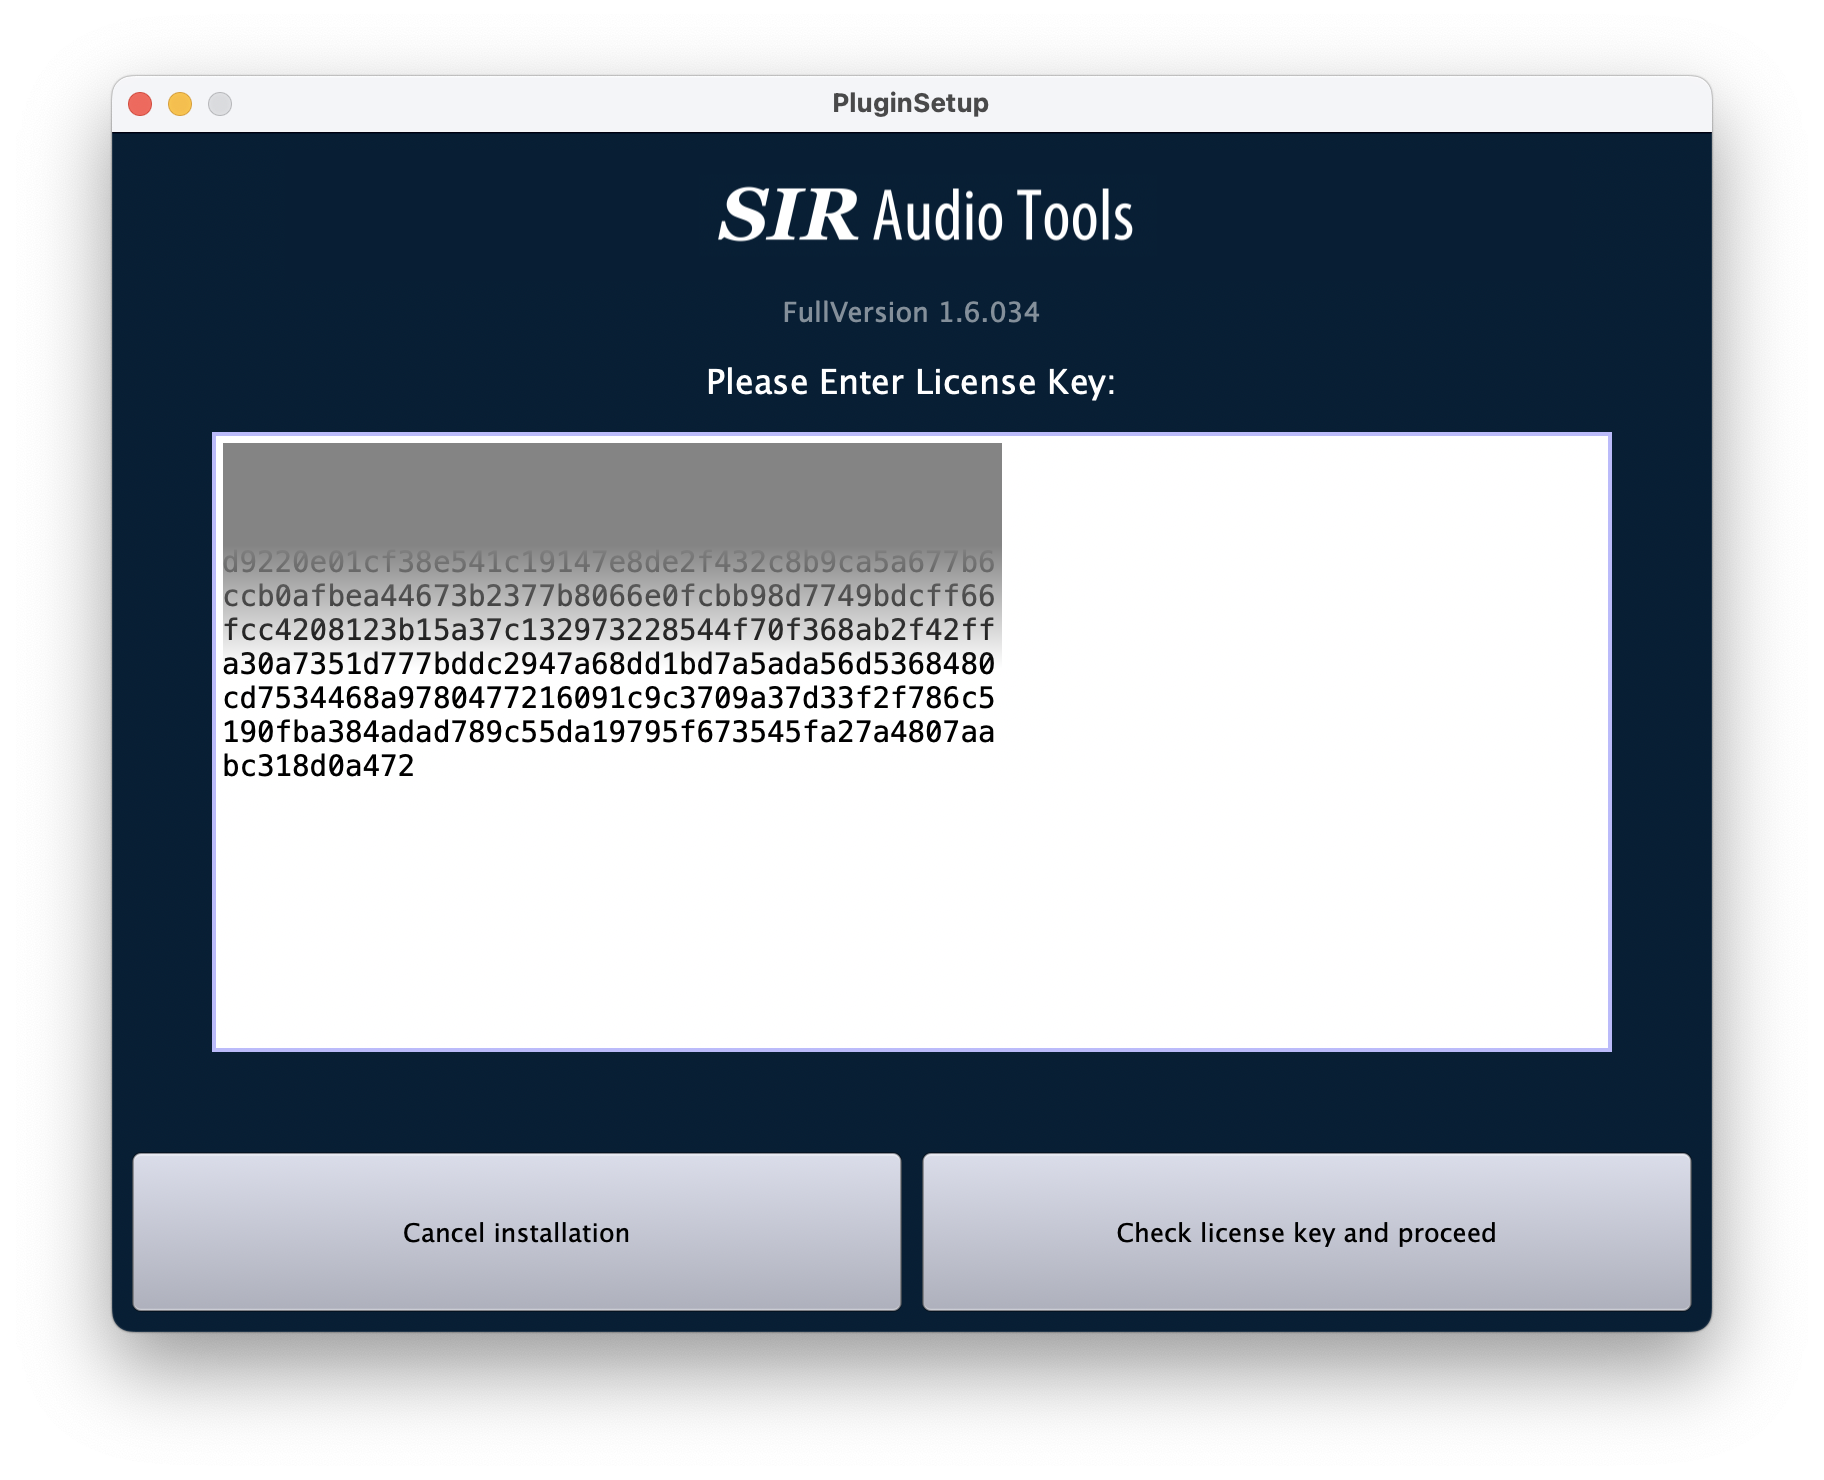
If this is a first-time installation, the license key will be requested at this point. First, copy the license key from the mail you received after purchasing the software. If you can't find your license key, please make use of our License-Key Recovery Tool.
Select the license key and press the key combination "Command" + C, so that you can copy it. To paste the license key into the input field of the installer, press the key combination "Command" + V.
If the license-key isn't accepted:
- Please check again that you are using the correct product installer and not accidentally using an installer for another product. Also check that you are not accidentally using a license key for another product. If you are no longer sure, you can also request your license keys using our License-Key Recovery Tool.
- Sometimes it also happens that a license key is changed by an automatic translation service and is therefore invalid. This often affects Spanish or French-speaking users. Please make sure that such a translation function is deactivated.
- If this doesn't solve the problem, please take a screenshot of the installer after you have inserted the license key and send it to us. We will analyse the problem promptly and send you a feedback.
The correct plugin paths for VST, VST3 and AAX plugin formats are pre-configured automatically. If you want, you can change them manually, but that is not recommended. Press "Install Now!" and confirm the installation settings.
Windows
Open the zip-File and double-click on the containing setup executable-file.
The unpacking process may take a while. Once it's over, you'll see a Windows notification asking "Do you want to allow this app to make changes to your device?" Please select YES.
Please click on the "I agree" button if you agree to the "License and Legal Information".
If this is a first-time installation, the license key will be requested at this point. First, copy the license key from the mail you received after purchasing the software. If you can't find your license key, please make use of our License-Key Recovery Tool.
Select the license key and press the key combination "Control" + C, so that you can copy it. To paste the license key into the input field of the installer, press the key combination "Control" + V.
If the license-key isn't accepted:
- Please check again that you are using the correct product installer and not accidentally using an installer for another product. Also check that you are not accidentally using a license key for another product. If you are no longer sure, you can also request your license keys using our License-Key Recovery Tool.
- Sometimes it also happens that a license key is changed by an automatic translation service and is therefore invalid. This often affects Spanish or French-speaking users. Please make sure that such a translation function is deactivated.
- If this doesn't solve the problem, please take a screenshot of the installer after you have inserted the license key and send it to us. We will analyse the problem promptly and send you a feedback.
Choose the correct plugin paths for VST, VST3 and AAX plugin formats. If you are not sure where the plugin directory of your DAW software is located, please look into the manual, or use the settings dialog of your DAW. Please make sure that the host is using the same architecture (32bit/64bit) as the plugin.
De-installation
General
Mac
Download the installation package and double-click on the containing PKG File, then click on:
"Continue" -> "Install"
The custom de-installation process starts afterwards.
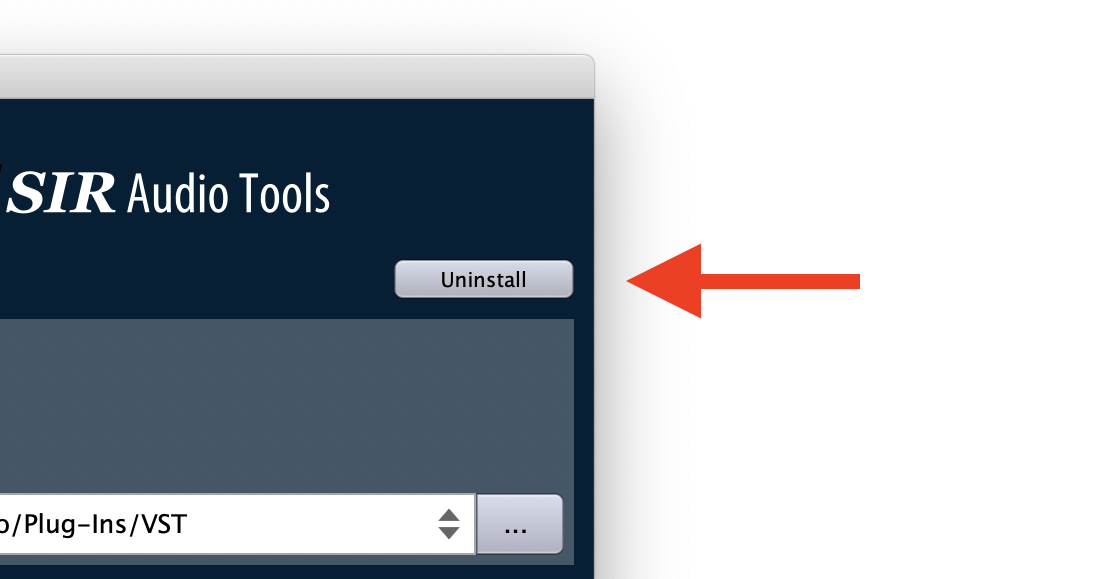
Accept the license agreement and click on the "Uninstall"-button at the top right corner. To finalize the process, click the "Uninstall Now!" button.
Windows
Additional Files
Mac
/Users/username/Music/Audio Music Apps/SIR Audio Tools
Windows
%APPDATA%\SIR Audio Tools
GUI Overview
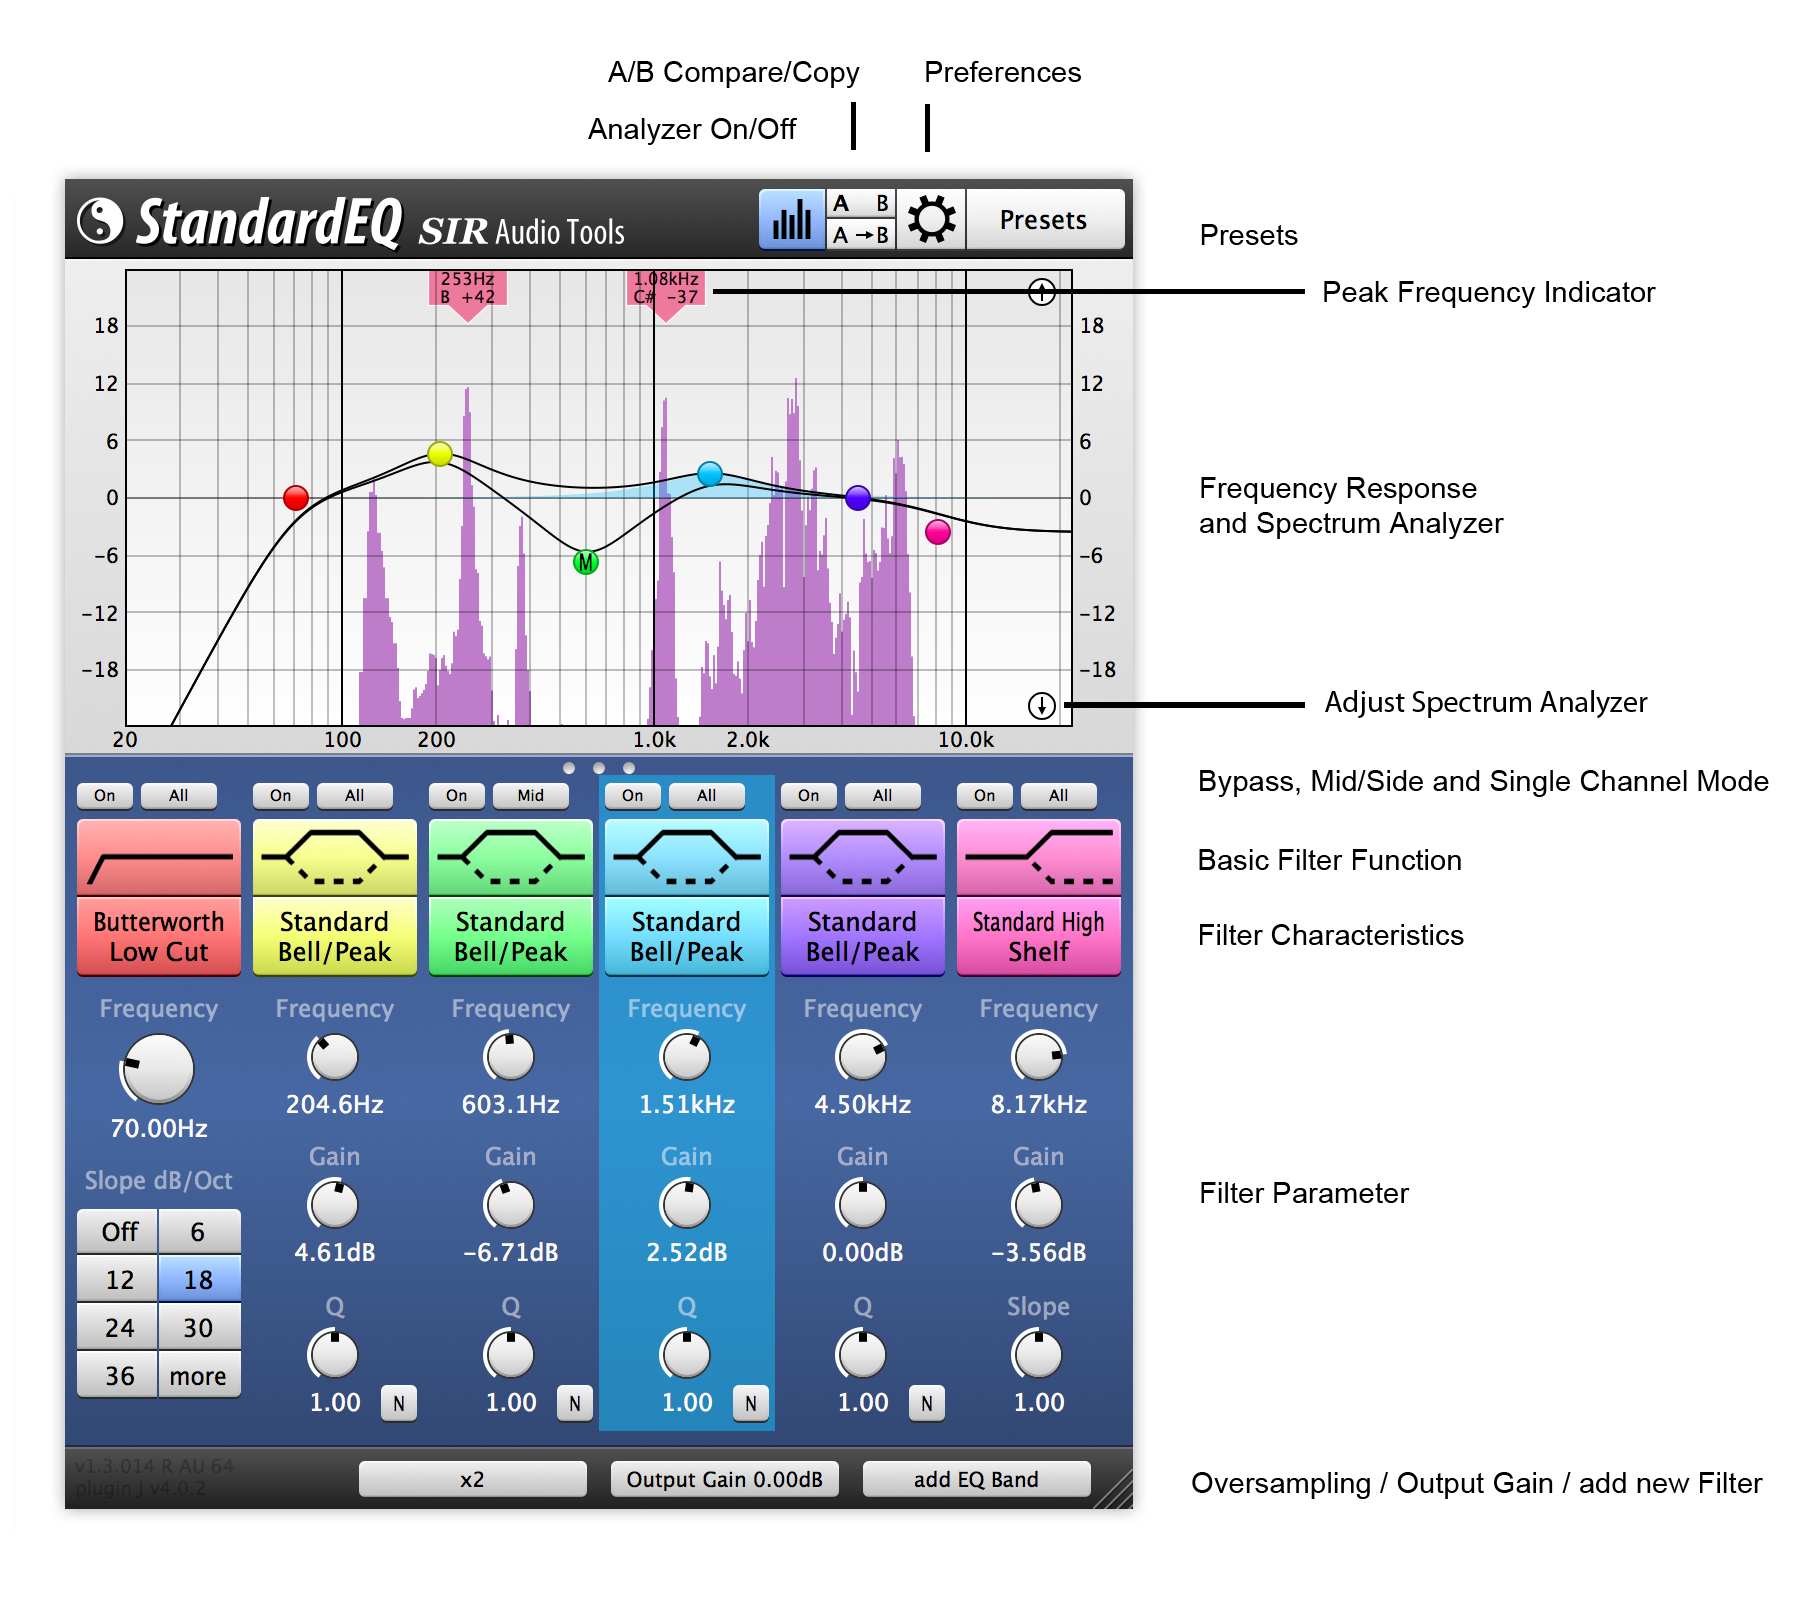
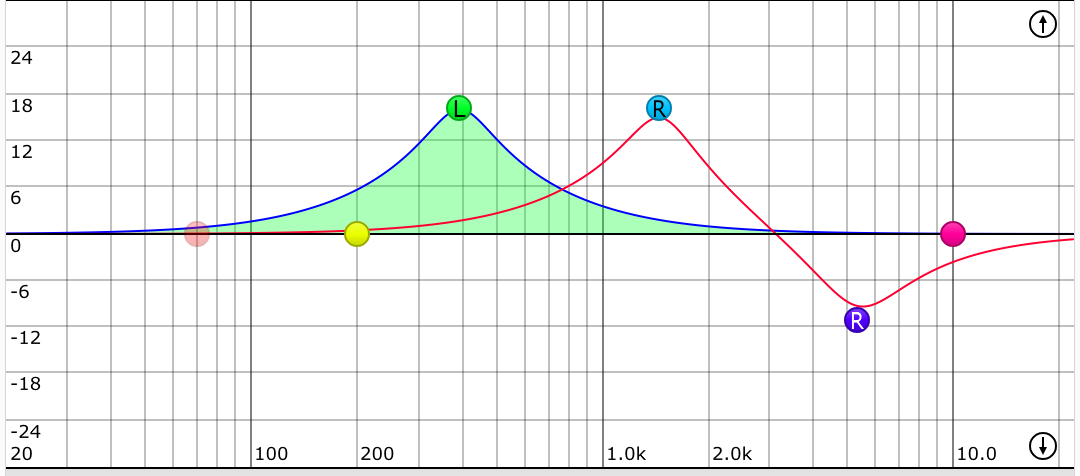
Frequency Response Display and Spectrum Analyzer
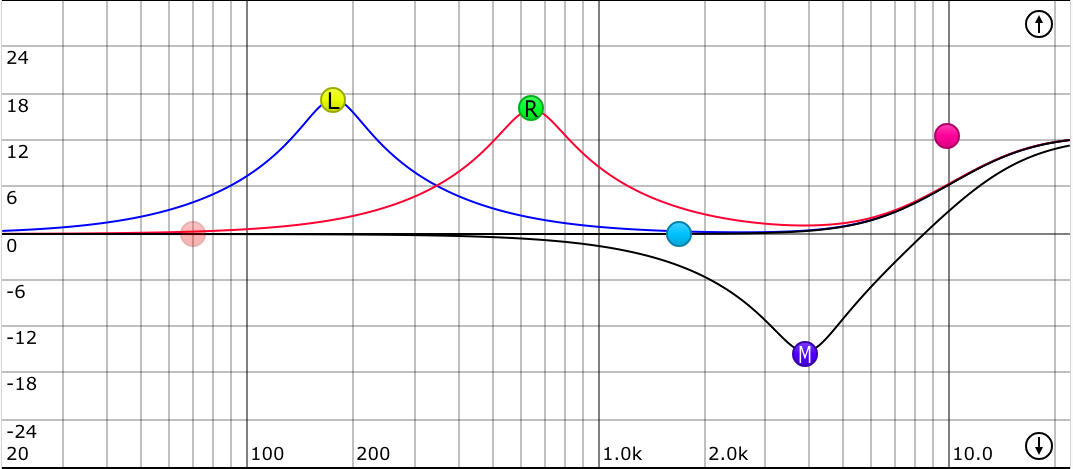
When some of the filters are working in mid/side or single channel-mode (see below) the line splits up in as many parts as are required to represent the transformation.
You can drag the small round knobs to change values of the filters directly in the display.
- press "alt" while dragging, to change gain only
- press "ctrl" while dragging, to change frequency only
- press "shift" while dragging, to let the frequency-value snap to the nearest detected frequency peak
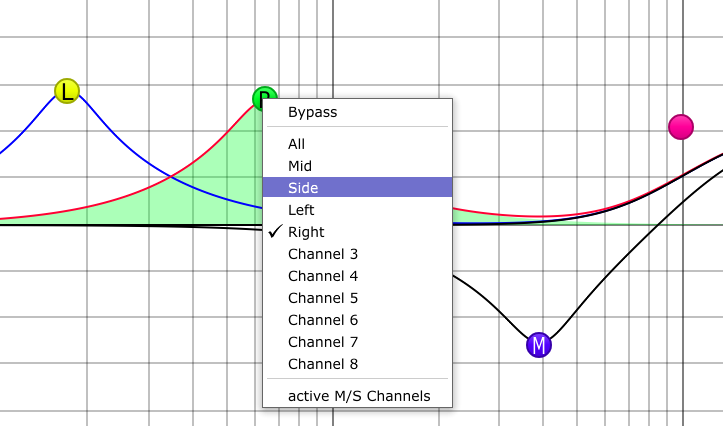
If you click on the knob with the right mouse button, a popup-menu appears, to let you change the channel-working mode of a filter directly.
For example if you want one of the filters to be applied only to the right channel, choose the "Right"-item from the popup menu. (For more information about these modes, see below.)
If a filter is currently not active (off) the knob is transparent. You can change the current bypass-state (on/off) by selecting the "Bypass" item in the popup-menu.
To turn on/off the graphical frequency spectrum analyzer, just click on the button (five vertical bars) on the top of the interface.
The analyzer needs a few milliseconds to initiate.
Adjust the visible gain-range of the analyzed signal with the small round arrow buttons on the right side. The analyzer will only take CPU consumption, if visible. For more analyzer settings, see below.

The peak-frequency indicators can be also configured to only work inside a specific frequency range. To define the area, drag the mouse inside inside the display, from begin to the end of the part which needs to be analyzed.
Filters
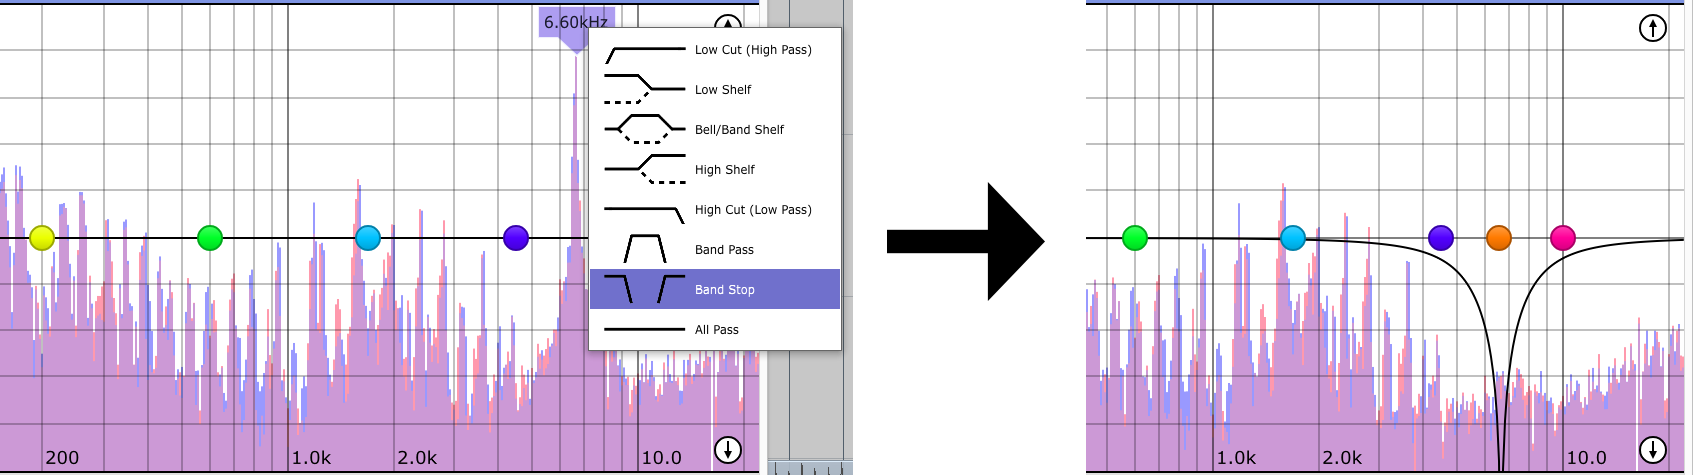
There are two different buttons which enable you to choose a filter.
The first one select the basic filter function: Low-Pass/High-pass/Bell etc...
The second button, allows you to select a specific characteristic, like Standard/Butterworth/Bessel etc...
| Standard standard/default filter implementation, characteristic similar to the most analog mixing consoles | Butterworth a filter with a flat frequency response in the passband | Bessel a filter with maximally flat group delay | Legendre a filter with maximum roll off rate | |
| Bell/Band Shelf increase/decrease gain in a certain frequency range | 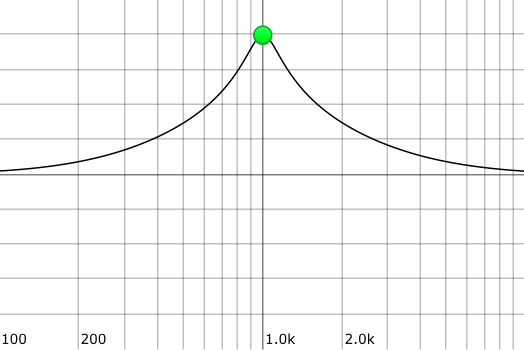 | 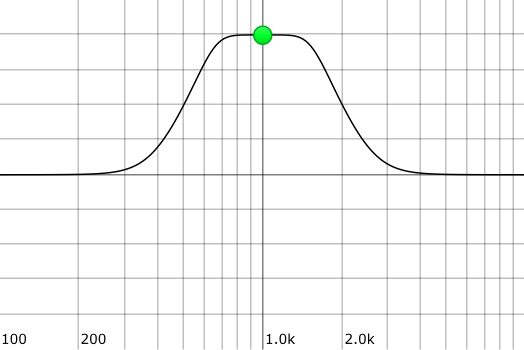 | ||
| Low-Cut Remove all frequencies below a certain frequency | 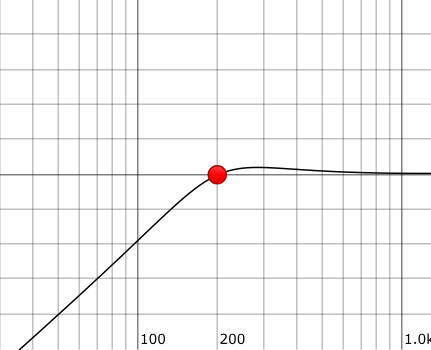 | 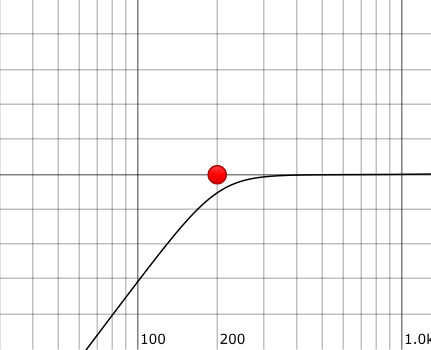 | 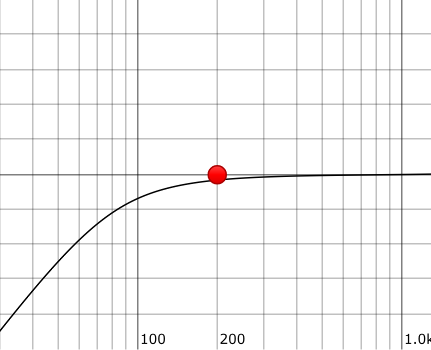 | 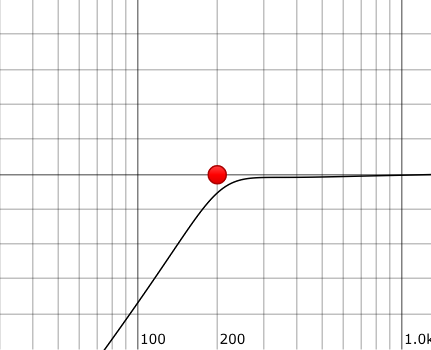 |
| Low Shelf increase/decrease all frequencies below a certain frequency |  | 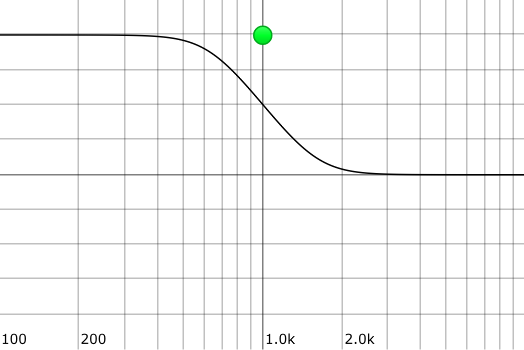 | ||
| High Shelf increase/decrease frequency gain above a certain frequency | 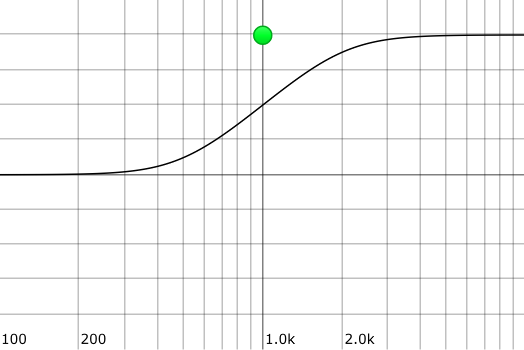 | 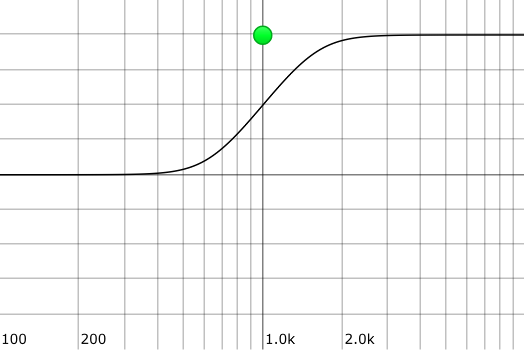 | ||
| High Cut remove all frequency above a certain frequency | 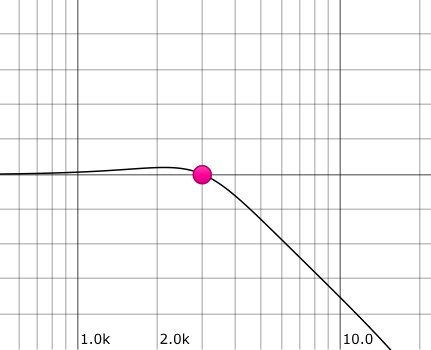 | 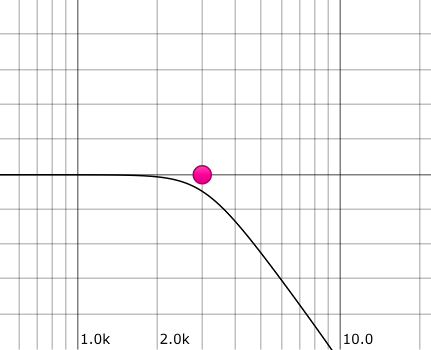 | 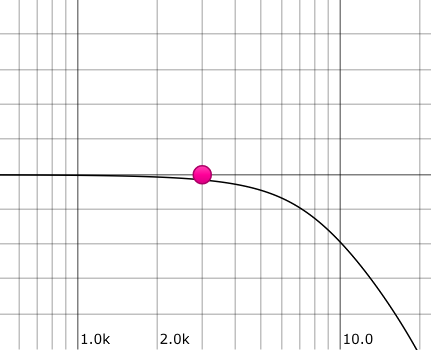 | 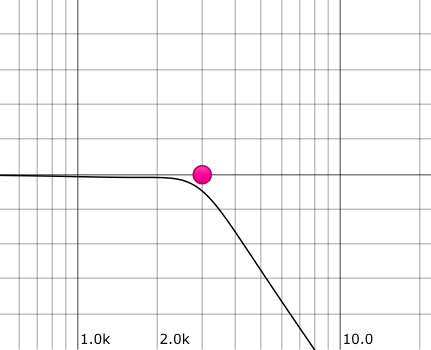 |
| Band-Pass | 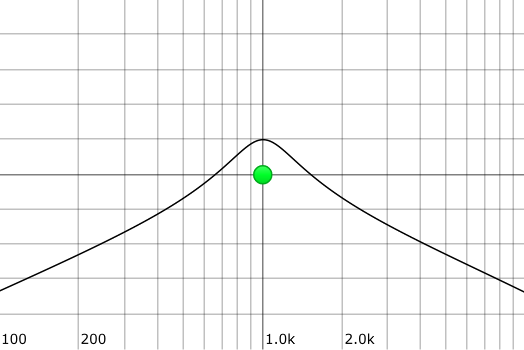 | 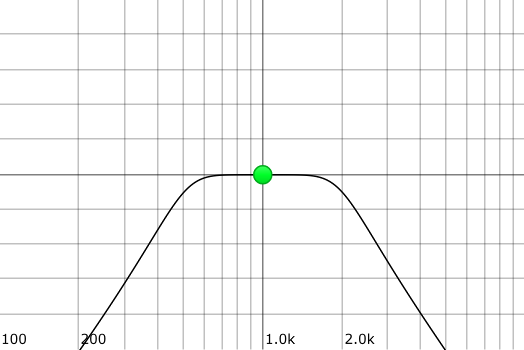 | 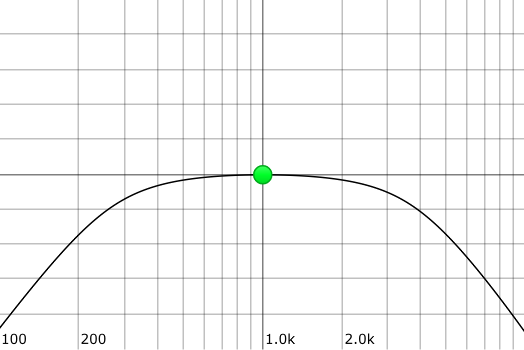 | 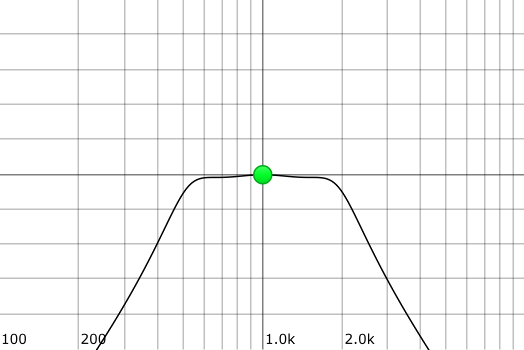 |
| Band-Stop remove all frequency in a certain frequency band | 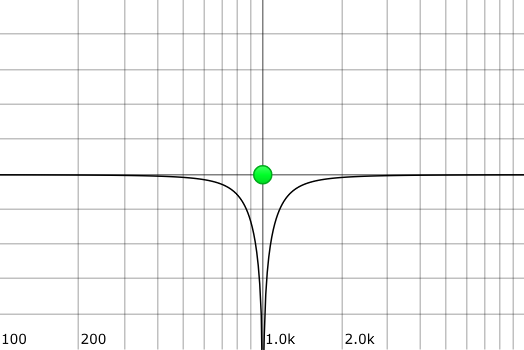 | 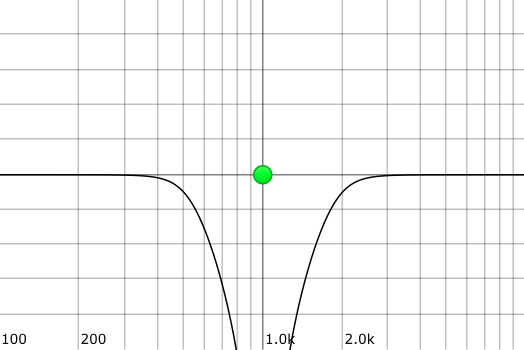 | 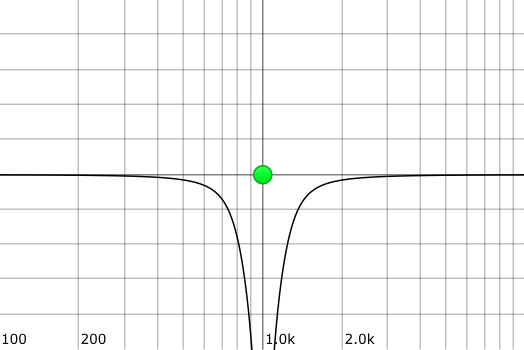 | 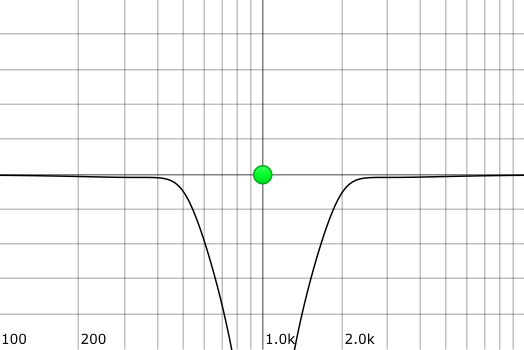 |
| All-Pass | 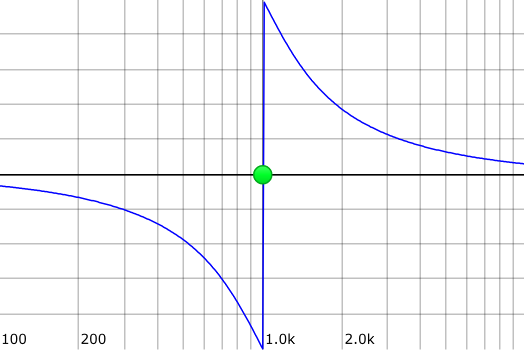 |
Filter-Parameters
Main Filter Parameters
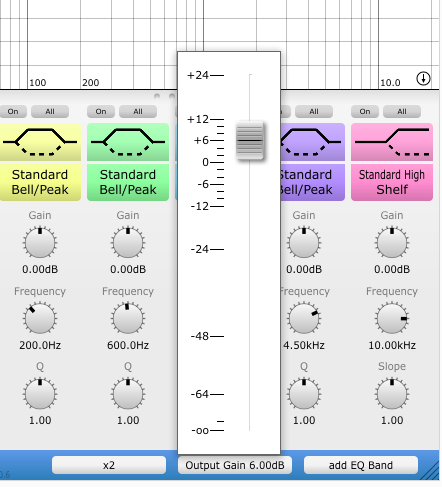
Gain
Bandwidth
Steepness Selector
Crossfade-Automation-Mode:
Some filter models, switch the way how the filter-parameters (like frequency, gain etc.) will be calculated above a certain steepness when used with automation. Instead of interpolate every single filter parameter, the output of the filter will be interpolated with the output of the filter which has updated filter-parameters. This guarantees better filter-stability. Click on "more", if you see something like "54dB >= crossfade-automation-mode", it does mean that every steepness above or equal 54dB uses crossfade-automation-mode. If you need very smooth filter-parameter automation, use a steepness which is below 54dB.
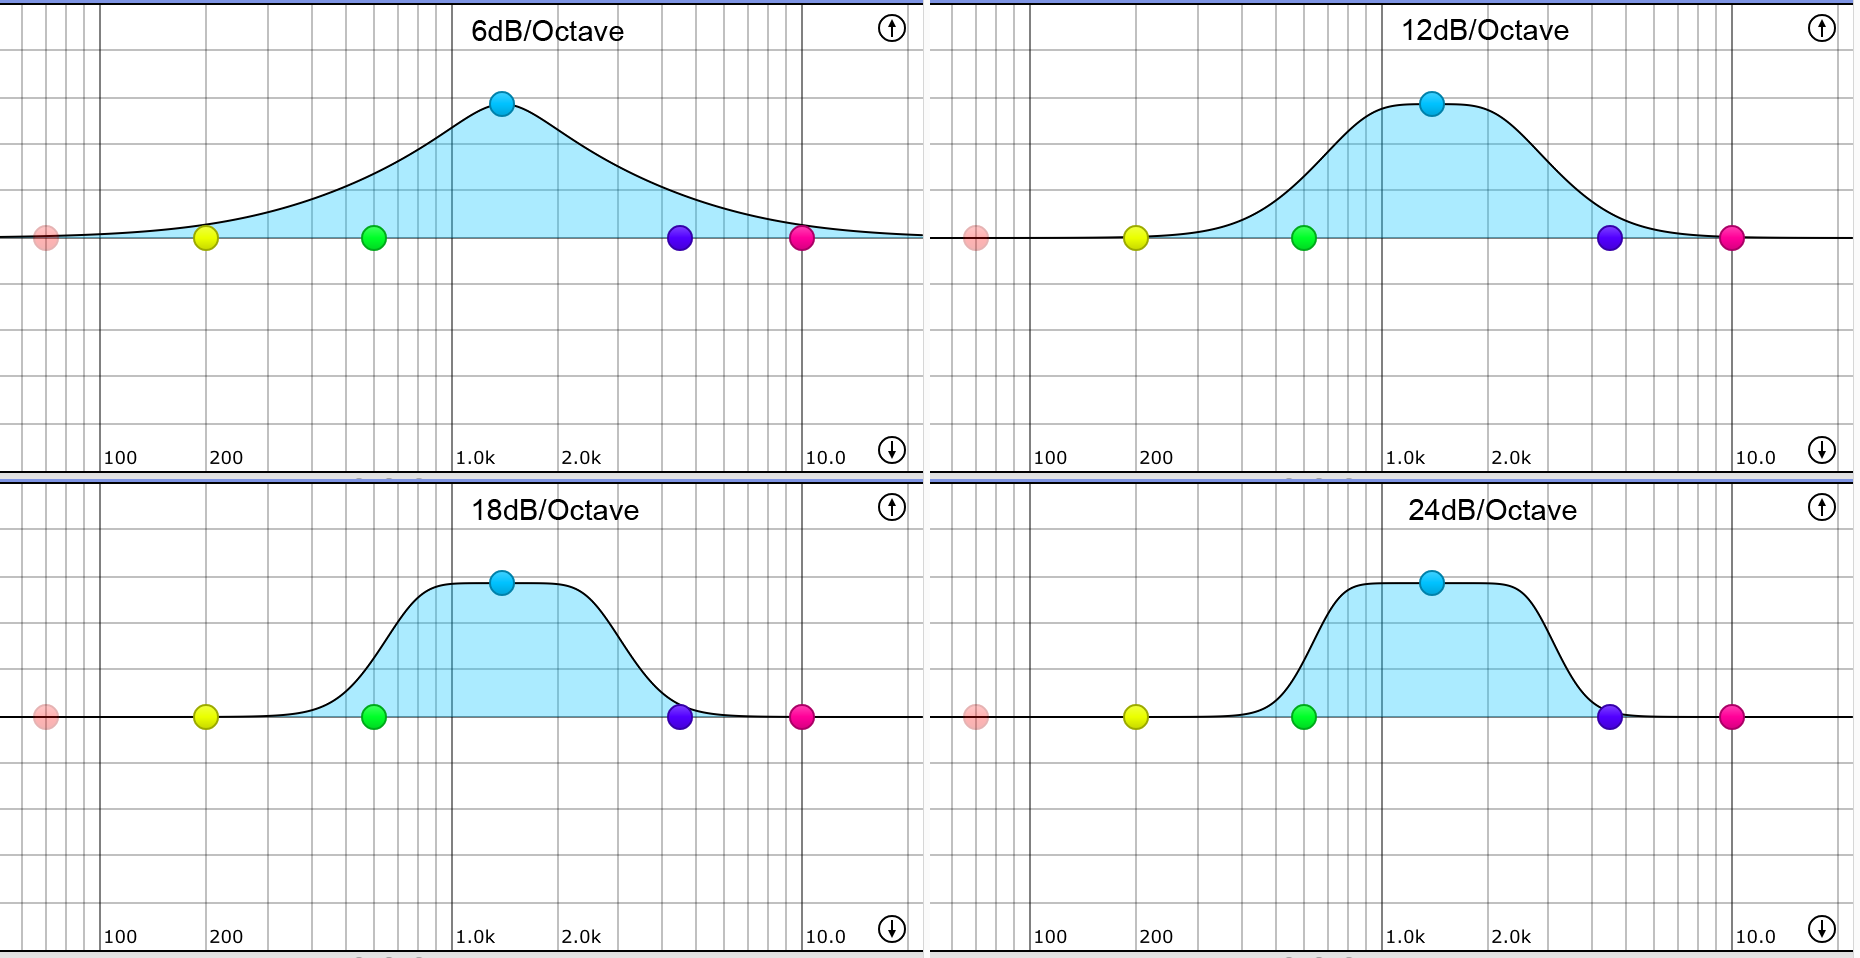
Slope
On/Off
Mid/Side or single Channel Mode
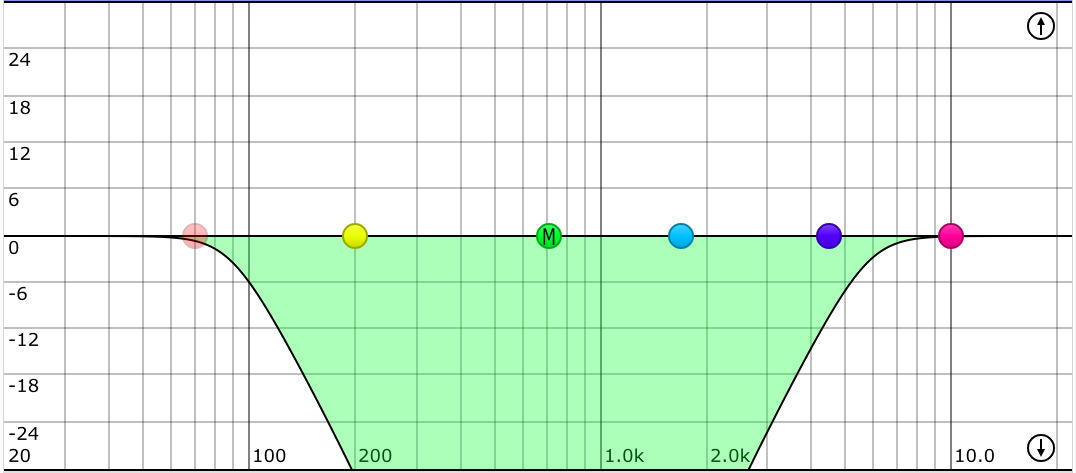
Examples: If you want to remove all stereo-information below a certain frequency, choose a Low-Cut-Filter and "Side"-mode, this is useful for Vinyl-Mastering.
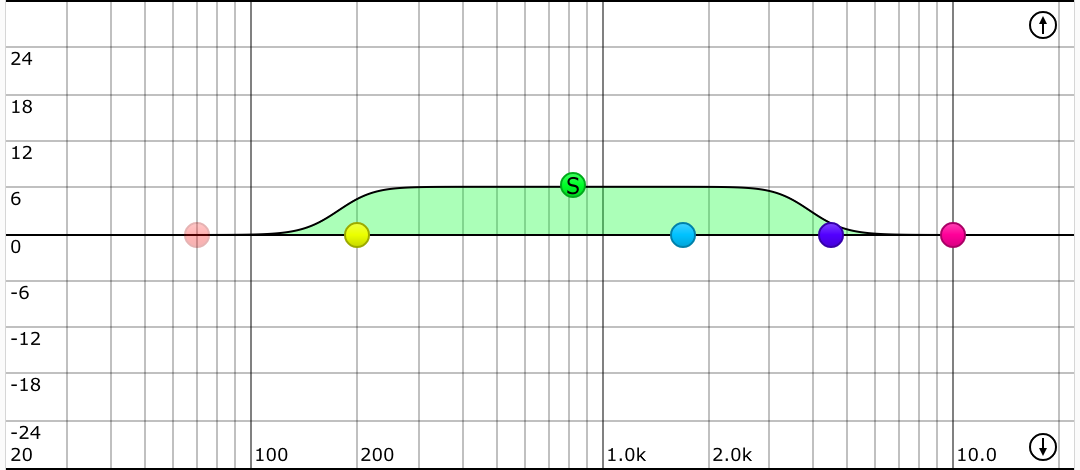
If you want to boost stereo-widths in the mid frequency range, choose a bell-filter and a positive gain-value and "Side"-mode.
Should the M/S operation mode also have effect on other channels, choose the „active M/S-Channels“-item from the drop-down menu.
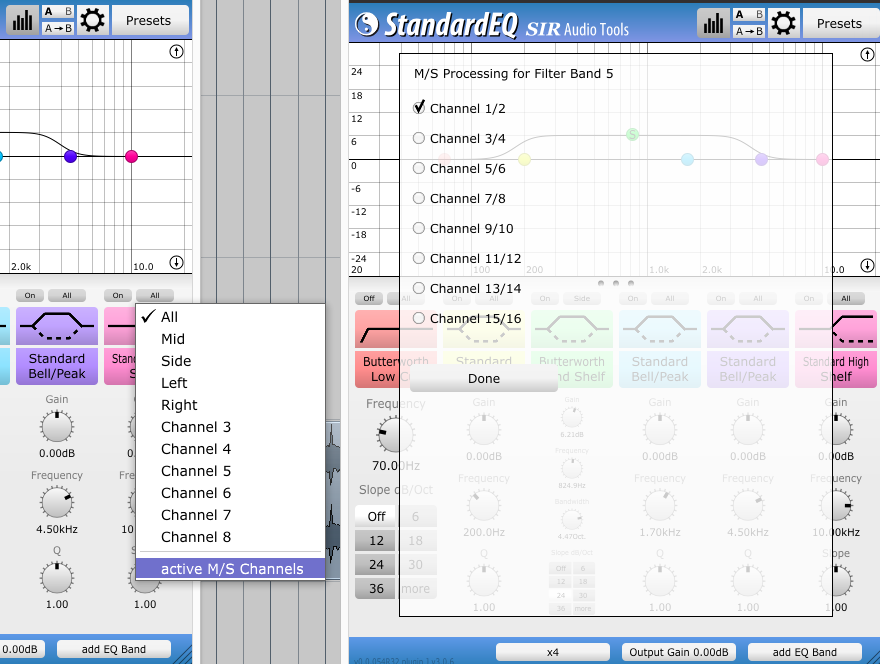
If single channel mode is selected (Left/Right/3/4/5/6/7/8) , only one channel will processed per filter. So you can independently adjust the signal of the left and right channel.
Parameter Link
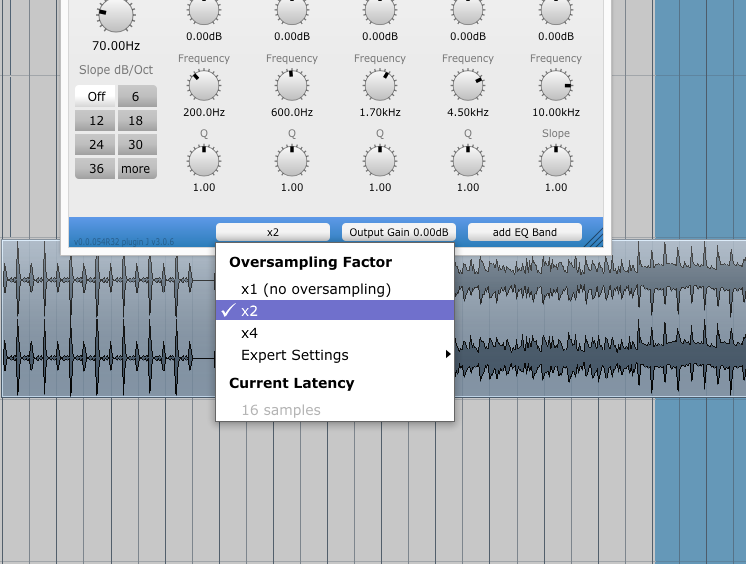
Oversampling
Usually x2-oversampling is enough for best results, because equalization is a linear process, no higher oversampling factors are necessary. With no oversampling, the filter will show asymmetric behavior near the Nyquist-frequency.
Oversampling-Advanced settings
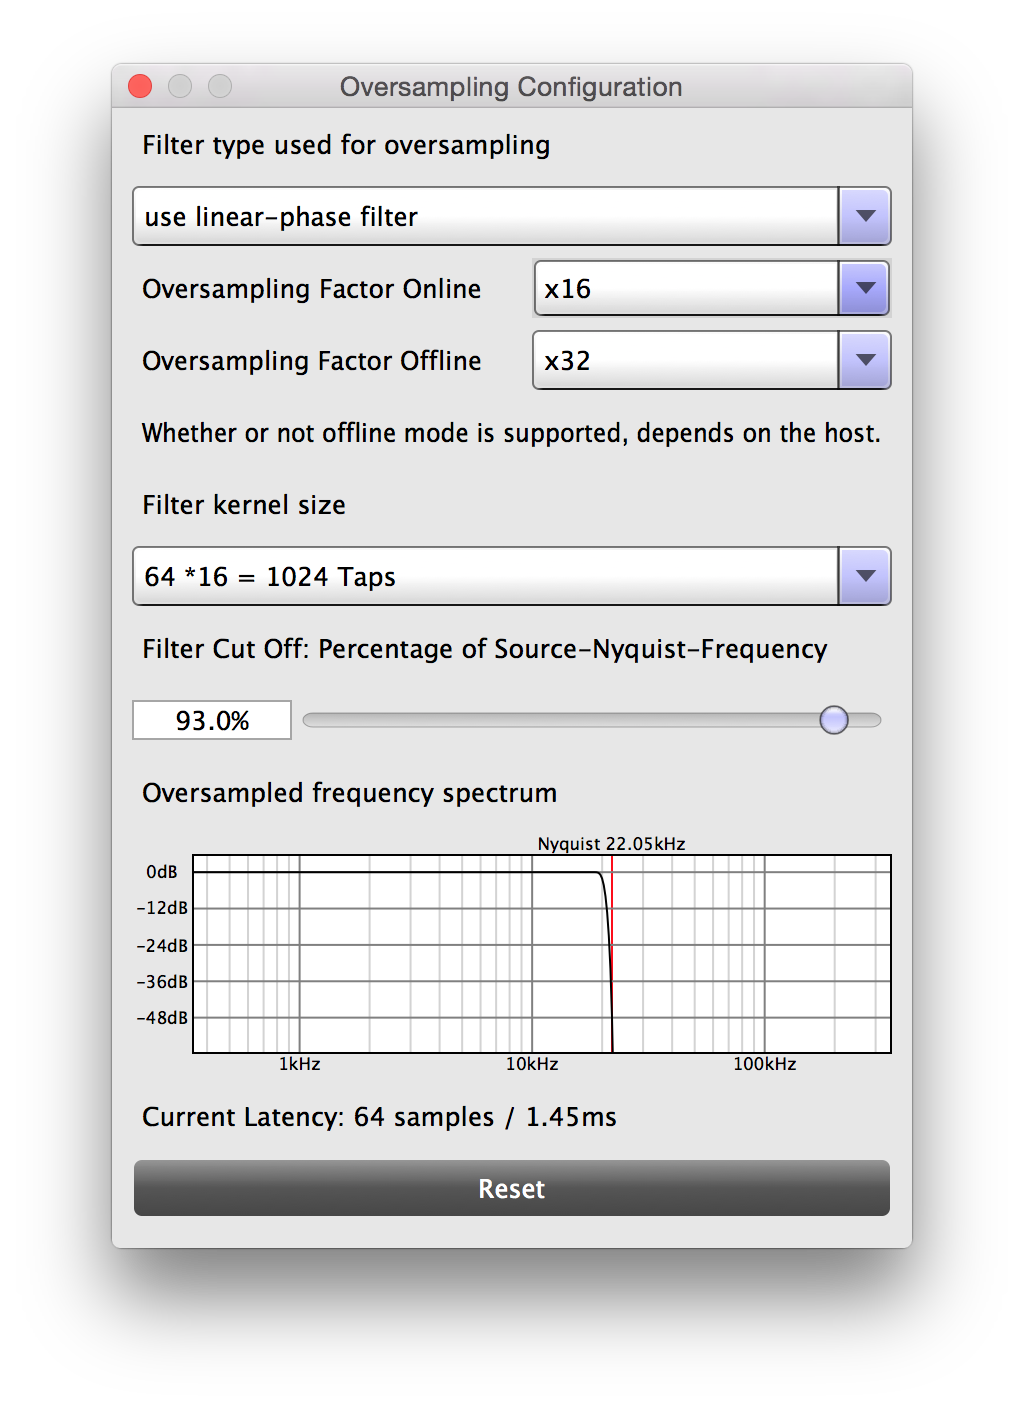
Band-limiting Filter type
- linear-phase (adds latency to the signal, but doesn’t induce phase shifting to the signal. This type is preferred for most applications (including mastering)
- use minimum-phase filter (adds no latency to the signal, but induces phase-shifting to the signal) for live usage
Oversampling Factor Offline
This function has been successfully tested with:
- Pro Tools 12 (File -> Bounce To -> Disk), the „AudioSuite“ clip rendering function from the menu still uses the online oversampling factor
- Logic Pro X (File -> Bounce -> Project or Section)
- Cubase 8 (File -> Export -> Audio Mixdown)
- Ableton 11 (File -> Export Audio/Video)
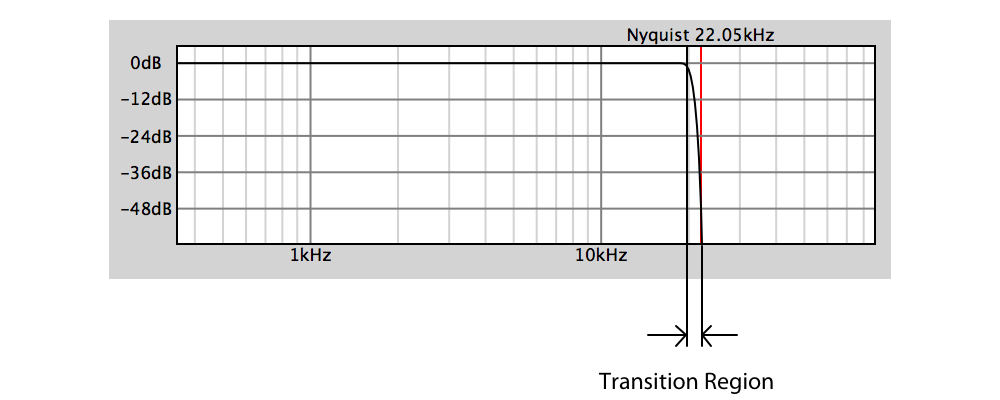
Filter Cut Off
Filter Kernel Size (only with linear phase filter)
Filter-Order (only with minimum phase filter)
Reset
Output Gain
Analyzer Settings
Presets
Resolution
FFT Analyzer
FFT-Size
Analog Band Analyzer
Bands Per Octave
Filter Band Steepness
Time Resolution
Release Speed
Peak Detection
Hold
RMS (only for Analog Band Analyzer)
Channels
Per analyzer-channel you can either analyze a single audio audio-channel, the mid-signal (e.g. Left+Right) or the side-signal (e.g. Left-Right).
Display
Other
Frequency Response - Pink Noise as Flat Response
Smoothing
Options Menu
Reset Parameter
View
Phase Shift
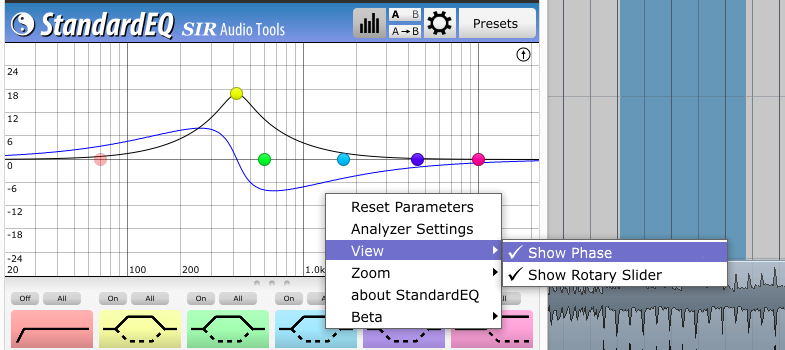
Rotary Knob
Display Range
Zoom
Presets
If you want to delete a certain preset, click on it and press the delete button. If you want to organize the presets and create/delete folders, click on the ".." button and select "manage folder/presets". This will open the location of the presets in the Explorer(Win) or Finder(Mac), and you can freely manage your presets, by just moving the files around as you like.