Introduction
Standard Compressor is an easy-to-use audio-plugin for compression. It offers zero-latency processing with low CPU-consumption.
A compressor is most commonly used to reduce dynamic range to help instruments sit in the mix and stop peaks from jumping out of the mix. Reducing peaks also allows the average volume to be louder without the signal clipping, so tracks and mixes will be perceived as louder. This compressor goes a few stages further than most, with some niche controls, giving exciting creative possibilities.
The scrolling audio display shows in real time how the waveform gain is being processed. This compressor includes the usual standard controls to help tighten up your dynamics.
There is EQ on the sidechain input which can be used for frequency focused compression applications. Also, the external sidechain option allows for creative compression effects. There is MIDI control of the compressor too for further creativity such as rhythmic dynamic effects.
As well as the fully equipped compression, there is a dynamic saturation section pre or post the compressor. The clipping algorithms are similar as the now iconic StandardCLIP. There is a variety of saturations and distortions that emulate the hardware and software of yesteryear to give exciting and musical colouration to your tracks. Because the saturation is dynamic, it can yield a more musical distortion where distortion is exaggerated on the peaks, leaving quieter tails intact for more clarity in the mix. Alternatively, the clipping can be used more transparently allowing you to squeeze a few more dB from your drum submixes or masters by musically reducing any stray peaks. The oversampling reduces the alias tones from entering the audible range so clipping can be used more aggressively without unpleasant artefacts.
Installation
Mac
Open the dmg-File you have downloaded and double-click on the containing pkg-File. Select "continue" on the welcome screen. If you see the "Select the Destination" screen, you can click "continue" as well. Then, select "Install" and enter your admin password. The actual setup software will start afterwards.
Please click on the "I agree" button if you agree to the "License and Legal Information".
If this is a first-time installation, the license key will be requested at this point. First, copy the license key from the mail you received after purchasing the software. If you can't find your license key, please make use of our License-Key Recovery Tool.
Select the license key and press the key combination "Command" + C, so that you can copy it. To paste the license key into the input field of the installer, press the key combination "Command" + V.
If the license-key isn't accepted:
- Please check again that you are using the correct product installer and not accidentally using an installer for another product. Also check that you are not accidentally using a license key for another product. If you are no longer sure, you can also request your license keys using our License-Key Recovery Tool.
- Sometimes it also happens that a license key is changed by an automatic translation service and is therefore invalid. This often affects Spanish or French-speaking users. Please make sure that such a translation function is deactivated.
- If this doesn't solve the problem, please take a screenshot of the installer after you have inserted the license key and send it to us. We will analyse the problem promptly and send you a feedback.
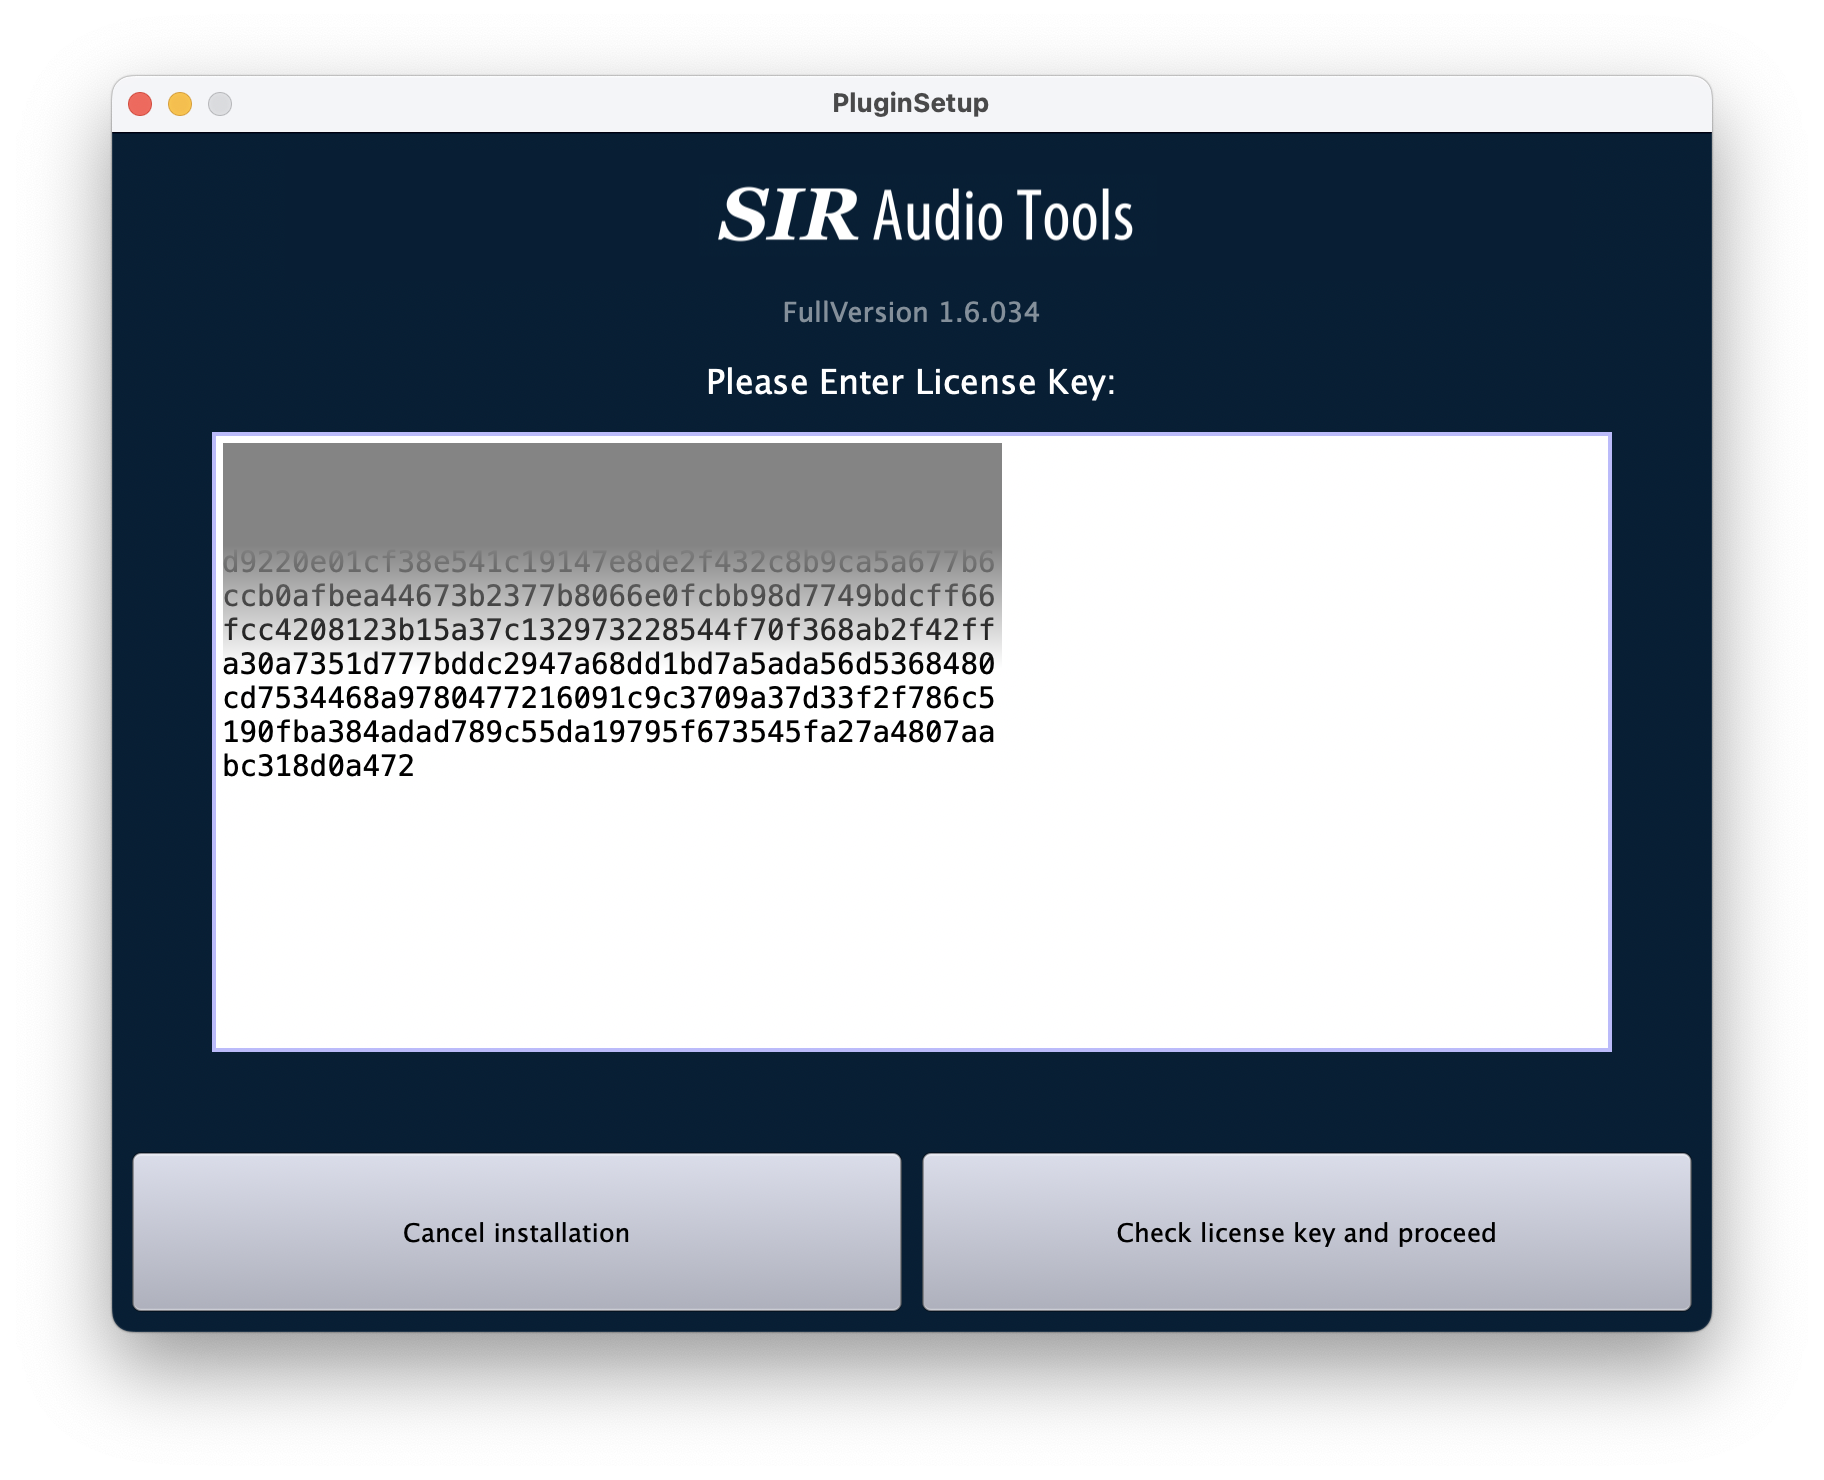
The correct plugin paths for VST, VST3 and AAX plugin formats are pre-configured automatically. If you want, you can change them manually, but that is not recommended. Press "Install Now!" and confirm the installation settings.
Windows
Open the zip-File and double-click on the containing setup executable-file.
The unpacking process may take a while. Once it's over, you'll see a Windows notification asking "Do you want to allow this app to make changes to your device?" Please select YES.
Please click on the "I agree" button if you agree to the "License and Legal Information".
If this is a first-time installation, the license key will be requested at this point. First, copy the license key from the mail you received after purchasing the software. If you can't find your license key, please make use of our License-Key Recovery Tool.
Select the license key and press the key combination "Control" + C, so that you can copy it. To paste the license key into the input field of the installer, press the key combination "Control" + V.
If the license-key isn't accepted:
- Please check again that you are using the correct product installer and not accidentally using an installer for another product. Also check that you are not accidentally using a license key for another product. If you are no longer sure, you can also request your license keys using our License-Key Recovery Tool.
- Sometimes it also happens that a license key is changed by an automatic translation service and is therefore invalid. This often affects Spanish or French-speaking users. Please make sure that such a translation function is deactivated.
- If this doesn't solve the problem, please take a screenshot of the installer after you have inserted the license key and send it to us. We will analyse the problem promptly and send you a feedback.
Choose the correct plugin paths for VST, VST3 and AAX plugin formats. If you are not sure where the plugin directory of your DAW software is located, please look into the manual, or use the settings dialog of your DAW. Please make sure that the host is using the same architecture (32bit/64bit) as the plugin.
De-installation
General
Mac
Download the installation package and double-click on the containing PKG File, then click on:
"Continue" -> "Install"
The custom de-installation process starts afterwards.
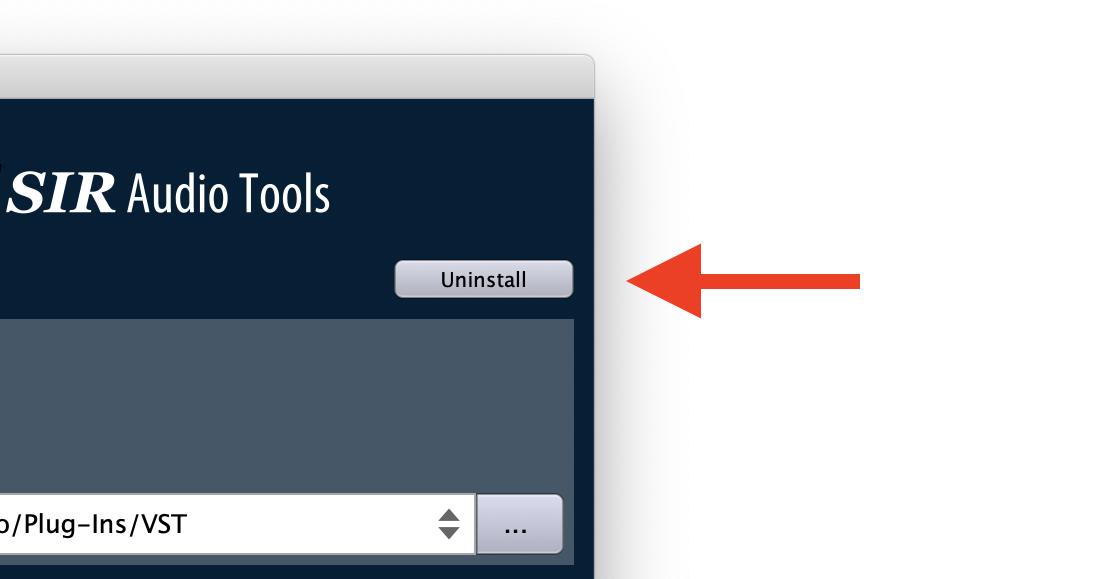
Accept the license agreement and click on the "Uninstall"-button at the top right corner. To finalize the process, click the "Uninstall Now!" button.
Windows
Additional Files
Mac
/Users/username/Music/Audio Music Apps/SIR Audio Tools
Windows
%APPDATA%\SIR Audio Tools
Sections
Main Display
The main display shows the audio signal in real time as a scrolling waveform. The input signal is the lighter shade. The output signal is the darker shade.
On the left-hand side is a graph of input (x-axis) against output (y-axis). The current level is illuminated as a orange (left/mid channel or mono) and blue (right/side channel) circle on the ratio line (the colors may be different in another color scheme).
Two controls of the compressor are controllable on the display by dragging the sliders: threshold and ratio.
Display options
"Det." or detection shows the sidechain detection signal as extra lines drawn on the display (one for each stereo channel). Usually this would just mirror the input signal if no sidechain is being used. However, if the sidechain has been EQed then it would be useful to see the effect of the EQ on the sidechain triggering, or if an external sidechain is being used to check that it's working as intended.
" Env ." or envelope shows the amount of gain reduction as an extra line drawn on the display. In stereo, both channels are combined and the maximum reduction value is displayed.
The dynamic saturation slider (on the bottom right of the plug-in) affects how the env is used:
-
Full grey (top), the displayed reduction corresponds to the actual volume reduction from the compression.
-
Full orange (bottom), the information from this envelope is used to dynamically influence the waveshaping (threshold) of the saturation.
The actual reduction due to compression and saturation can be read in the gain reduction meter.
The scroll speed can be altered between "slow", "medium" (default), "fast" and "fast+".
Clicking on "Zoom" allows you to adjust the range of the display. The default is -60dB which would cover most recordings. There are three levels of preset zoom, -48dB, -60dB and -96dB. Also, the zoom is customisable with the two sliders: the bottom slider moves the bottom of the range; the top slider moves the top of the range.
Threshold
The threshold is shown as the orange horizontal line. Signal above the threshold is reduced in gain. Signal below the threshold has no change in gain.
Lowering the threshold gives more compression, lowering the dynamic range.
The two channels of stereo are linked when the link symbol is illuminated which is useful for most applications. When the link symbol is off, a new slider appears so that each channel can be adjusted independently. Once you’ve adjusted the two channels separately, it’s possible to re-link the channels so that both move together proportionally. By command clicking the link symbol, a menu appears which allows you to re-align and link the threshold once more (as well as remove the link or link proportionally).
Ratio
The ratio is shown as the orange sloped line. Ratio specifies the amount of compression. Signal above the threshold is reduced in gain by the ratio. The ratio is the ratio between input signal and output signal. For example, with a ratio of 2:1, a signal exceeding the threshold by 8dB with be reduced by 4dB. If the ratio is 1:1, there is no compression, input equals output. If the ratio is infinity:1 then the output volume will be limited by the threshold, i.e. the threshold won’t be exceeded. Higher ratios give more compression, lowering the dynamic range.
A niche feature of Standard Compressor is that negative ratios are possible. This means that input signals above the threshold are made quieter than the quiet sounds below the threshold, this inverts the dynamics, so the loud becomes soft and vice versa. For example, this could be useful when layering live drums with programmed drums to remove transients that could flam.
The two channels of stereo are linked when the link symbol is illuminated which is useful for most applications. When the link symbol is off, a new slider appears so that each channel can be adjusted independently. Once you’ve adjusted the two channels separately, it’s possible to re-link the channels so that both move together proportionally. By command or right clicking the link symbol, a menu appears which allows you to re-align and link the ratio once more (as well as remove the link or link proportionally).
Knee
The knee slider is below the scrolling waveform display. The knee governs the transition from no compression below the threshold, to compression above the threshold. With a hard knee (slider full left), below the threshold is no compression and above the threshold full compression begins immediately. With a soft knee (slider full right) compression begins a little below the threshold and full compression isn’t reached until well above the threshold. This makes the transition from unity gain below the threshold to compression above the threshold sound more natural.
Range
The range slider is below the scrolling waveform display. The range is the maximum gain reduction permitted. Usually this would be set to maximum (so gain reduction isn’t affected by this control). With high ratios and low thresholds, when there is often a lot of gain reduction, the amount of gain reduction can be limited by lowering the range.
Gain Reduction Meter
In each individual channel strip you can also see how much volume reduction is achieved by traditional compression (thick grey bar on the left) or by saturation (thin orange bar on the right).
Gain
The input gain can be controlled using the "In Gain" slider on the left-hand side. The default position is 0dB. This would rarely need adjusting as long as the signal entering the plug-in is at a sensible level.
The processed signal gain can be controlled using the sliders on the right-hand side, one for each channel if stereo. When “Auto-Gain” is switched off, this gain would normally be increased to compensate for the gain reduction caused by compression. The best way to set this is to look at how much gain reduction there is on average and turn this gain up by that amount. This would yield an output volume that sounds similar to the input volume so that you can judge fairly whether the compression is improving the sound quality when flipping the bypass switch.
“ Auto-Gain” automatically compensates for the compression gain reduction. The auto gain is shown by the grey circles above the white circles. The auto gain is calculated from the ratio and threshold. For most scenarios, having the gain on 0dB with Auto-Gain switched on will suffice.
The two channels are linked when the link symbol is illuminated. When the link symbol is off, the two sliders can be adjusted independently.
The “S” switches are solo, one for each channel.
Time Parameters
Attack
The attack time is how long it takes for the gain to reduce after the sound exceeds the threshold. Longer attack times can help preserve transients in percussive sounds, but with higher ratios, could cause uncomfortable spikes in signal.
The two channels are linked when the link symbol is illuminated. When the link symbol is off, the two knobs can be adjusted independently.
Hold
The hold time is how long the compression remains with no change in gain reduction when the sound falls below the threshold. After the hold time has elapsed, the release phase begins. Most commonly, hold times are very short with the gain reduction controlled by the release.
The two channels are linked when the link symbol is illuminated. When the link symbol is off, the two knobs can be adjusted independently.
Release
The release time is how long it takes for gain reduction to return to unity gain after the sound falls below the threshold. Longer release times can make compression sound more natural avoiding pumping especially for sound sources with tails like a piano or cymbal.
The two channels are linked when the link symbol is illuminated. When the link symbol is off, the two knobs can be adjusted independently.
Auto (Release)
Auto dynamically changes the release time if there is a transient. When a transient is present, the release time is shorter; when there is not a transient, the release time is longer.
If auto is on 100% then the release time changes dynamically +-80%. For example, a
100ms release will change dynamically between 20ms and 180ms.
If auto is on 50% then the release time changes dynamically +-40%. For example, a 100ms release will change dynamically between 60ms and 140ms
If auto is on 0%, then the release time stays fixed.
Other Parameters
Link (Stereo)
Link is how much the stereo channel’s gain reduction is linked. Most commonly, this would be set to 100% so that the left and right channels have identical gain reduction, reducing image shift.
With link set to 0%, the gain reduction of each channel is completely independent. This can cause problems with stereo image shift. For example, with stereo drum overheads, if the left channel is suddenly made quieter by the gain reduction from a loud left side drum hit, other quieter sounds will appear to move right towards the other less compressed channel. However, it could be useful if independent control of the two channels is required.
Glue
Glue lets you decide how the compressor reacts to changes in volume. Think of it as the “shape”.
-
Lower values (0 – 30 %) keep the compressor transparent—ideal for subtle dynamics control.
-
Middle values (30 – 70 %) add musical cohesion, making elements “stick together” in a mix or bus.
-
Higher values (70 – 100 %) are great for drums, parallel compression, or anywhere you want punchy, fast-acting control without crushing quieter details.
Channel mode
For most normal applications, stereo would be controlled as a separate left and right signal which would be normal for most applications. However, this compressor has the exciting option to compress with mid-side control.
If all of the controls are linked, then the channel mode makes very little difference.
Left Right
For most compression applications, when parameters, e.g. ratio and threshold, are unlinked, there is separate control for left and right channels.
Mid Side
With mid side selected, when parameters are unlinked, e.g. ratio and threshold, there is separate control for the mid and side signals. This gives you creative control over the width of the stereo signal, e.g. if the side is compressed more, then the stereo width decreases, especially on the peaks.
Mono
If the plugin is mono, the mode is fixed to single channel processing so cannot be changed.
Sidechain
The sidechain is the signal that controls the compressor.
Internal
For most compression applications, e.g. reducing dynamic range of a human performance, the sidechain signal would be the same as the audio signal that is being processed.
External
It's possible to use a different signal to trigger the compressor. For example, if the compressor is inserted on a synth pad sound with a kick drum triggering the sidechain, the synth pad would duck when the kick drum was played giving that characteristic pumping found in EDM.
Sidechain-EQ and Analyser
The sidechain signal, either external or internal can be EQed. This would most commonly be done if the internal signal is being used to isolate a frequency that needs more compression, e.g. a de-esser can be created by EQing the internal sidechain with a boost on the sibilant frequencies so these would be attenuated more than the rest of the signal.
By clicking on the headphones signal, the sidechain signal can be monitored. This would be useful so that you can hear how the EQ is affecting the sidechain signal and whether you are correctly isolating the desired instruments with the EQ settings.
There is a four band EQ, the default filter types are described below and will cover most applications:
HPF (red)
This removes low frequencies of the sidechain signal. When clicking on the red dot, the controls for the HPF appear. The cutoff frequency can be adjusted by dragging the red dot or rotating the knob. The steepness of the slope can be selected between 6dB/oct, 12dB/oct, 18dB/oct, 24dB/oct, or "more" options. The higher the dB/oct, the steeper the slope so this increases the ability to isolate frequencies. The HPF can be disabled by selecting "off".
Parametric EQs (yellow and green)
There are two parametric EQs which would mostly be used for controlling the mid-frequencies of the sidechain signal. Clicking on the yellow or green dots reveals the controls for these parametric EQs. The centre frequency and gain can be adjusted by dragging the dots or dragging the two numerical values. The Q is the bandwidth of the peak. Higher Q values narrow the bandwidth so provide more focussed isolation of frequencies. Having the Q set to maximum can isolate particular frequencies.
High shelf EQ (blue)
This controls the amplitude of high frequencies of the sidechain signal. When clicking on the blue dot, the controls for the high shelf EQ appear. The cutoff frequency and gain can be adjusted by dragging the dots or dragging the two numerical values. The steepness of the slope can be selected between 6dB/oct, 12dB/oct, 18dB/oct, 24dB/oct, or "more" options. The higher the dB/oct, the steeper the slope so this increases the ability to isolate frequencies. The high shelf EQ can be disabled by selecting "off".
For each of the four EQs described above, by clicking on the filter type icon (visible with the controls when hovering over the coloured dot) a menu will pop up and it is possible to change the filter type from a selection of low shelf, band, high shelf, band stop, low cut, high cut, band pass and all pass.
Display Mode FFT/Bandpass
The real-time spectrum analyser shows the frequency content of the sidechain signal. Command clicking or right clicking accesses a menu that lets you select either two modes, FFT or bandpass. It can also be disabled.
Detector
Detector is the knob just to the right of link; it's not actually labelled "detector". This gives the method used to detect the level of the input signal used by the compressor threshold. The default setting is "RMS decay".
For most applications, “peak” or “RMS decay” would suffice. In general, peak would give a more compressed signal than RMS for the same given threshold.
Peak
With peak detection, the compressor threshold looks at the signal at a given instant. Even brief signals would trigger the compressor to reduce gain. This peak detector has a special adaptation so signals with low frequency content are detected reliably preventing distortion.
RMS (Decay and window)
Using RMS instead of peak causes the input volume to be averaged over the length of time specified by the knob; the compressor threshold is looking at an average volume instead of the volume at that instant.
Peak dB values are greater than average RMS dB values of the same signal. Therefore, when using RMS settings, a lower threshold is needed to give an equivalent amount of compression, i.e. reduce the threshold if using RMS settings for similar amount of compression.
With smaller windows, the RMS compression will begin to behave more like peak because it will be similar to measuring the signal at an instant rather than over a period of time.
Using RMS slows the response time of the compressor so the compression could be delayed, leaving uncompressed transients which may sound like unpleasant clicks.
There are two RMS settings:
RMS Window
RMS Window treats all signal within the length specified by the knob with the same importance.
RMS Decay
RMS Decay applies different importance to the signal according to its age; older signal has less importance. In general.
Lookahead
This enables the compressor to act before the signal passes above the threshold. This can help helps catch unruly transients or prevent clicks if the compressor isn’t acting fast enough to catch them.
Longer attack times are sometimes useful to prevent clicks and other artefacts, especially with low frequency sound sources like bass guitar. Look ahead is particularly useful to prevent unwanted transients getting through with longer attack times.
Some DAWs take some time to get back in sync when the latency of a plugin has changed. For others, sound playback must be stopped and restarted. With some DAWs the Plugin-Delay-Compensation must be activated first.
Although DAWs should compensate for plug-in latency, lookahead should be used with care in live situations because when switched on, the latency causes a musically noticeable delay.
The maximum look-ahead time can be chosen between 0..10ms/100ms/1000ms (*), which also defines the plug-in latency.
* Please note, the maximum look-ahead time of 1000ms is not supported when using the AAX plugin format for compatibility reasons.
Saturation
There is a variety of colourful saturations and distortions to give musical warmth to your tracks. Alternatively, the clipping can be used more transparently allowing you to increase RMS loudness. The oversampling reduces the alias tones from entering the audible range so clipping can be used more aggressively without unpleasant artefacts.
This saturation can also be used dynamically so it can yield a more musical distortion where distortion is exaggerated on the peaks, leaving quieter tails intact for more clarity in the mix.
Distortion types
Various distortion types can be selected. The various response curves of the distortion types can be seen on the graph below.
Saturation
Very subtle warm harmonic distortion; very soft clipping
Soft Clip
Soft clipping, but much harder than “saturation” yielding a brighter clipped tone.
Hard Clip
Hard clipping, a brutal slammed hard clip.
Subtle Tube
A very similar tone to “saturation” but with some asymmetry introducing some even harmonics. A very warm tube drive.
Tube
One step further than “subtle tube”; more asymmetry for more present even harmonics and harder clipping. A warm tube drive.
Warm Tube
A warmer version than “subtle tube”. Some asymmetry for some even harmonics but less bright sounding than “subtle tube”.
Broken Tube
This is harder clipped than the other tube options. Very asymmetric for extreme even harmonics.
Broken Radio
No asymmetry so hard clipping with odd harmonics. Similar to “hard clipping” but less bright.
Saturation Pre/Post/Off
This switch can be used to select whether saturation is applied before (Pre) or after (Post) compression. Saturation can also be switched off completely (Off).
Using pre, i.e. saturating before the compressor, is likely to give more saturation because the peaks would not have been tamed by the compressor.
Using post, i.e. saturating after the compressor, is useful for taming any stray peaks that the compressor didn’t catch (e.g. with long attack or low ratios).
Impact
This slider acts rather like a threshold for the saturation. Lower slider positions create more saturation for a more driven tone.
Dynamic Saturation Slider
In a musical sense, this slider can be thought of as a cross fader between the compressor and the saturation.
This slider uses the gain reduction envelope to adjust the amount of dynamic saturation/ drive, i.e. it’s as if the impact slider is moving according to the amount of signal. For louder sections of music, there is more drive yielding more distortion on louder peaks.
For example, on a drum sub-mix, this can yield a more musical distortion where distortion is exaggerated on the peaks, leaving quieter tails intact for more clarity in the mix.
On the graph to the left of this slider, you can see the saturation response curve moving more dynamically as you cross fade to more dynamic saturation (moving the slider down more into the orange).
When the dynamic saturation is on maximum orange , then there is no normal gain reduction; it’s just the saturation that is reducing the gain, i.e. the signal is saturating rather than reducing in gain. The envelope from the compressor is used to reduce the threshold of saturation completely.
As dynamic saturation increases, the auto-gain (on the output) will have less effect. When the dynamic saturation is on maximum (maximum orange), then auto-gain will have no effect.
Diff.
When “diff.” is selected, then you’ll hear the difference between the input and the output. This would let you very easily hear how much difference there is between the input signal and your compressed signal.
Dry / Wet
This controls the balance between the input and output signal. For most applications, this would be set to 100% wet. Parallel compression is possible by reducing the wet percentage. However, it would usually be more intuitive to leave this on 100% and control the wet/dry balance with your mixer faders, e.g. using a bus.
MIDI
MIDI can be used to trigger Standard Compressor. In your DAW, configure the plug-in so that it accepts a MIDI signal. This would be different in different DAWs. For example:
-
In Cubase, you put Standard Compressor on an audio track, then route the output of the MIDI track-out to the plug-in.
-
In Logic, create an instrument track and insert Standard Compressor as the instrument. Then use the sidechain to route the audio from a different audio track to Standard Compressor.
When using MIDI to trigger the compressor, interesting creative rhythms with a high level of MIDI control can be created on sustained signals, adding layers of rhythm to a mix.
Off
Off is default. MIDI does not affect compression.
MIDI only
The audio detector is disabled and only MIDI will trigger the compressor, i.e. the threshold and ratio have no effect. This setting would probably be the most useful for full MIDI control.
MIDI overrides
MIDI works in combination with the threshold and ratio controls to trigger the compressor. If there is a MIDI note present, then the threshold and ratio are disabled and the MIDI note governs the amount of gain reduction. When there is no MIDI note present, then the compression is governed by the threshold and ratio as normal.
More velocity more reduction
This is the most intuitive setting, so would be most commonly used. With this setting, if a MIDI note is present then the note velocity governs the amount of gain reduction. Higher velocities give more gain reduction.
The range control still works to control the range of compression within the velocities.
For this setting, it would usually be best to select “MIDI only” so only the MIDI velocity is governing the gain reduction.
Full reduction while note on
If a MIDI note is present, then maximum gain reduction is applied.
This is the same as “more velocity more reduction” but not velocity sensitive.
The range control works to govern the amount of gain reduction.
If MIDI triggering only is required (ignoring the threshold triggering), then select "MIDI only" too.
Note on prevents compression
When there is a note on, then no compression occurs. This is more useful when combined with “MIDI overrides” so a MIDI note-on essentially is a bypass switch.
Common Parameters
Oversampling
Oversampling-Advanced settings
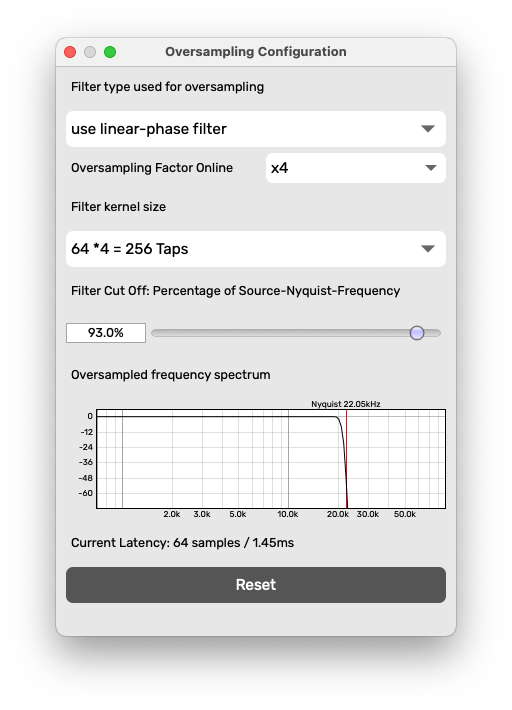
Band-limiting Filter type
- linear-phase (adds latency to the signal, but doesn’t induce phase shifting to the signal. This type is preferred for most applications (including mastering)
- use minimum-phase filter (adds no latency to the signal, but induces phase-shifting to the signal) for live usage
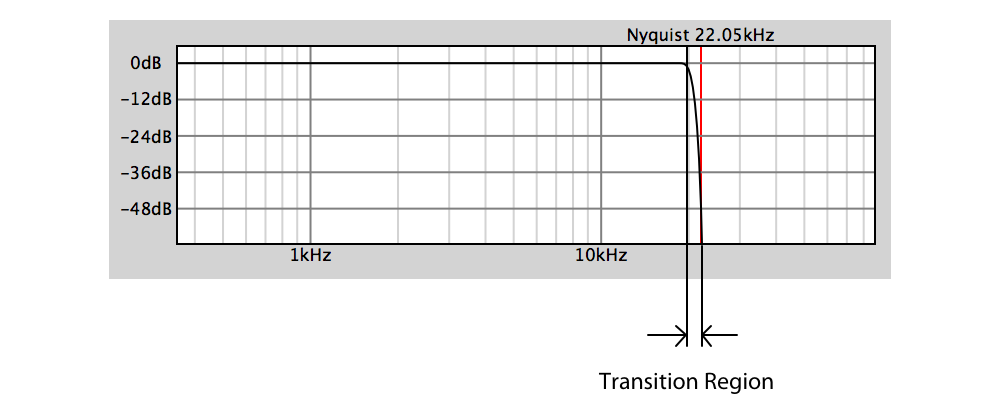
Filter Cut Off
Filter Kernel Size (only with linear phase filter)
Filter-Order (only with minimum phase filter)
Reset
Compare A/B A=B
This tool allows you to compare the effect of different settings quickly with just one button press. When you have the settings you like, press A=B. Then make some changes to see if you can improve on these settings. Then you can flip between the original settings and the new settings by pressing A/B. When you have decided which is better, press A=B again. You can repeat this process as many times as you like to fine tune parameter settings.
This is a useful tool to check if any changes you've made actually improve the sound and not made it worse! Remember that endless tinkering usually leads to tired ears and an awful mix!
GUI (in settings)
Zoom
Adjust the whole plugin-GUI size.
Appearance
Adjust the colours.
Presets
Presets can be stored by pressing “presets” then “Add preset”. Presets can be recalled by simply clicking on a preset from the list.
Or you can use the normal facility to store presets in your DAW if it supports this.